


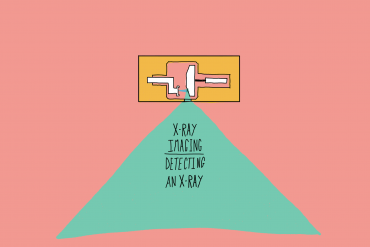
A Medical Student’s Guide to: X-Ray Imaging – Detecting X-Rays
Online Tutoring
I offer online tuition to students studying Biology, Chemistry and Physics at secondary and tertiary levels. I am happy to take on clients from around the world and have a proven track record of top marks achieved by my students. I also tutor for the medical entrance exams, mainly focusing on the UCAT and UCAT ANZ.
To enquire further and set up a free consultation, please use the contact form on this website, drop me an email or contact me through SuperProf.
This post is all about detecting x-rays in medical imaging and is the third and final x-ray physics article. If you haven’t already had a read of the first two, you can learn all about What x-rays are and How we create x-rays. I’d highly recommend reading them before moving onto this last post!
How do we detect X-Rays?


X-Rays are now often measured digitally, creating modern digital images to display in screens. In the past, they were commonly detected using fluorescent film, that created visible light photons when exposed to X-Ray photons (fluorescence).
There are multiple advantages of digital imaging over film imaging (analogue):
- Increased options for optimisation of exposure, display and dynamic range
- Increased ease of storage and sharing
- No handling of chemicals
- Allows for digital image processing
There are, however, multiple options for recording a digital X-Ray image. These include Computed Radiography, Direct conversion of X-Rays to charge and indirect conversion of X-Rays to charge (via a Phosphor).
A phosphor is a material that produces visible light when exposed to radiation
Let’s briefly looks at each of these options:
Computed Radiography: A digital image that can be “read” from the screen

- Incident X-Rays pass though the patient, arriving at a photostimulable phosphor
- The incident X-Rays are absorbed by the material, exciting electrons from the valence band to the conduction band (resting state to excited state)
- Most of the excited electrons return naturally to their valence band spontaneously, producing visible light. This is called spontaneous luminescence.
- Some of the electrons fall into energy traps, higher energy states that are stable enough to be maintained.
- By exposing the material to light of a specific energy (using a laser), the electrons can be removed from these energy traps, and fall back to their valence band. This creates a photo-stimulated luminescence.
- Any residual electrons in energy traps can be cleared by flooding the material with light, effectively erasing the image from the screen.
- The photo-stimulated luminescence is captured in photo-multiplier tubes, which convert incoming photons to charge.
Indirect detection of X-Rays: Using a phosphor to create a visible light signal, and storing this digitally
- Incident X-Rays pass though the patient, arriving at a phosphor
- The incident X-Rays are absorbed by the material, exciting electrons from the valence band to the conduction band (resting state to excited state)
- The excited electrons return to their valence band spontaneously, producing visible light. This is fluorescence
- This light must now be detected.
- For this, we can use a photodiode array. This is a semiconductor with a voltage across it, and capacitors attached ready to store charge.
- The incoming photon interacts with atoms in the photodiode, creating an ion and free electrons. This is the photoelectric effect.
- These electrons drift toward the anode and collect in the nearby capacitor.


Direct detection of X-Rays: using a higher energy photodiode to directly convert incident X-Ray photons to electric charge.
- Incident X-Rays pass though the patient, arriving at a photodiode.
- The incoming photon interacts with atoms in the photodiode, creating ions and free electrons. This is the photoelectric effect.
- These electrons drift toward the anode and collect in the nearby capacitor.
The charge collected by all three techniques is converted into an intensity value and presented in greyscale on a monitor as an X-Ray image.
So how do we see the anatomy?
Human beings are made up of a range of tissues. Some are low density, like lung tissue, and x-ray radiation has very little trouble passing through. Therefor, a large proportion of the emitted photons reach the detector and create charge. These areas of low attenuation are displayed on the image as black.
Some tissues are high density, like bone, and x-ray radiation has much more difficulty passing through. Much less of the photons emitted by the x-ray tube will reach the detector when passing through dense tissues. The detector will build up less charge at these areas and will display this as white on the final image. There are then tissues such as muscle, which have a medium density, and are displayed as a value between black and white (hence greyscale!).
The final x-ray image depicts the relative attenuation of each area of patient anatomy the x-ray beam has passed through. The higher the intensity value, the whiter the pixel is displayed as and the higher the attenuation of the tissues between that area of the detector and the x-ray tube.
The last three x-ray posts were very physics intensive! The x-ray imaging modality is an incredibly common imagine modality, but one that is poorly understood by most medical students.
If you have found these imaging guides interesting and would like me to write more please let me know! I am now coming to the end of my Bachelor’s of Science (Hons.) in Imaging Sciences, so I have a tonne of content I could write on imaging. I want to hear from you, the readers! What would you like me to cover?
I always love to connect with my readers. So please do get in touch on Twitter and Linkedin! You can also use the contact form on the website or leave a comment below. You can SUBSCRIBE for updates and post notifications at the bottom of this page.


-
-
5 years
-
Tagged Medical School, Medical student